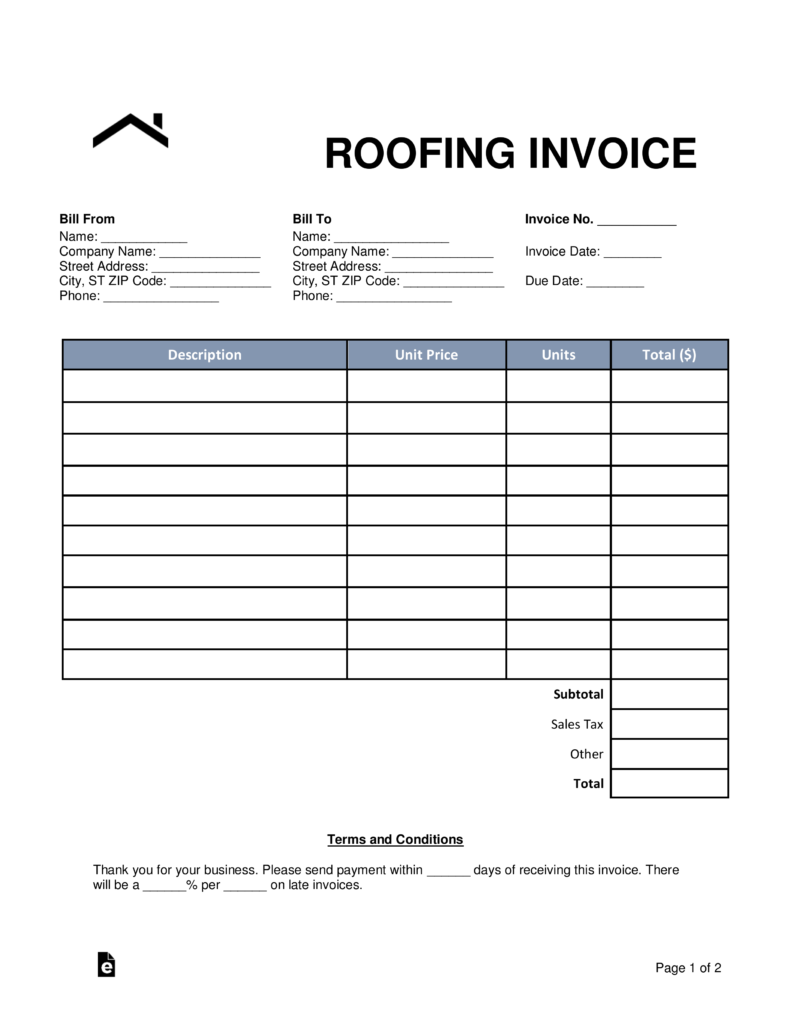
When it comes to managing a roofing business, one of the most important aspects is invoicing. A roofing invoice is a document that outlines the details of a roofing job, including the services provided, the materials used, and the total cost. It is essential for both the roofer and the client to have a clear understanding of the work that has been done and the amount owed.
In this comprehensive guide, we will delve into everything you need to know about roofing invoices, including what they are, why they are important, and how to create one effectively.
What is a Roofing Invoice?
A roofing invoice is a legal document that serves as a record of the services provided by a roofing contractor. It includes all the necessary information about the job, such as the client’s name and contact information, the date of service, a detailed description of the work performed, the cost of labor and materials, and any additional charges or discounts. The invoice is typically sent to the client after the completion of the roofing project and serves as a request for payment.
Roofing invoices are crucial for several reasons. Firstly, they provide a clear breakdown of the costs involved in a roofing job, ensuring transparency between the roofer and the client. Secondly, they serve as a legal document that can be used as evidence in case of disputes or legal issues. Lastly, they help the roofer maintain accurate financial records and ensure timely payment for their services.
Why are Roofing Invoices Important?
Roofing invoices play a vital role in the smooth operation of a roofing business. Here are a few reasons why they are important:
- Transparency: A detailed invoice provides transparency to clients by clearly outlining the costs and services provided.
- Legal Protection: Invoices serve as legal documents that can be used as evidence in case of disputes or legal issues.
- Financial Records: Invoices help roofers maintain accurate financial records, making it easier to track income and expenses.
- Payment Tracking: By sending invoices promptly and keeping track of payments, roofers can ensure timely payment for their services.
- Professionalism: Invoices contribute to the overall professionalism of a roofing business, reflecting well on the company and building trust with clients.
How to Create a Roofing Invoice
Creating a professional and effective roofing invoice is essential for every roofing business. Here are the steps to follow:
1. Use a Template
Using a pre-designed invoice template can save you time and ensure that all the necessary information is included. There are many free and paid invoice templates available online that you can customize to suit your specific needs. Look for a template that includes fields for the client’s information, a detailed description of the work performed, and a breakdown of costs.
2. Include Relevant Information
When creating a roofing invoice, make sure to include all the relevant information, such as:
- The name and contact information of your roofing company
- The client’s name and contact information
- The date the invoice was issued
- A unique invoice number for easy tracking
- A detailed description of the work performed
- The cost of labor and materials
- Any additional charges or discounts
- The total amount due
- Payment terms and methods
3. Be Clear and Specific
When describing the work performed on the invoice, be as clear and specific as possible. Include details such as the type of roofing material used, the square footage of the roof, and any additional services provided, such as gutter cleaning or repairs. This level of specificity helps both the client and your team understand the scope of the work and prevents any misunderstandings or disputes.
4. Calculate the Total Cost
Calculate the total cost of the roofing job by adding up the cost of labor and materials, as well as any additional charges or discounts. Clearly state the total amount due on the invoice to avoid any confusion.
5. Set Payment Terms
Specify the payment terms on the invoice, including the due date and accepted payment methods. Common payment terms for roofing invoices are 30 days or less, but you can customize this based on your business needs. It’s important to communicate your expectations to the client to ensure timely payment.
6. Branding and Professionalism
Add your roofing company’s logo, colors, and contact information to the invoice to reinforce your branding and maintain a professional appearance. This helps build trust with clients and enhances the overall perception of your business.
7. Send the Invoice Promptly
Once the roofing job is completed, send the invoice promptly to the client. This shows professionalism and helps ensure timely payment. Consider using online invoicing tools or email to send invoices quickly and efficiently.
Sample Roofing Invoice Template
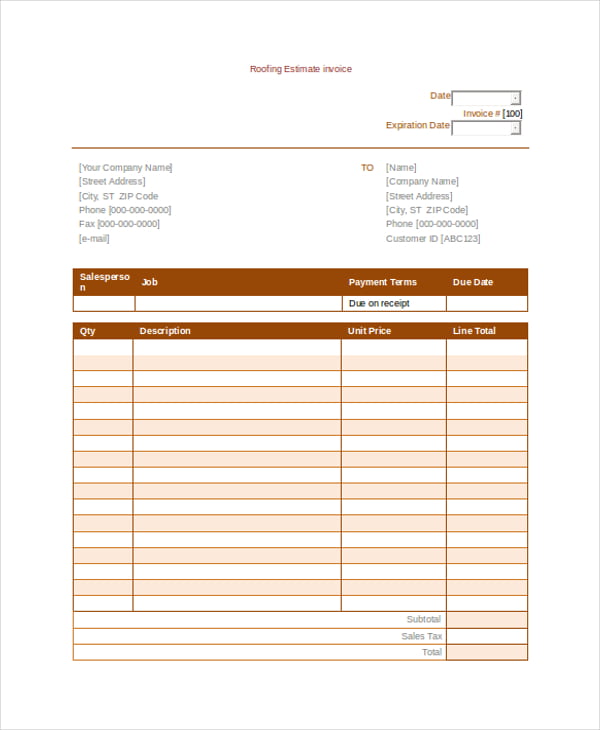
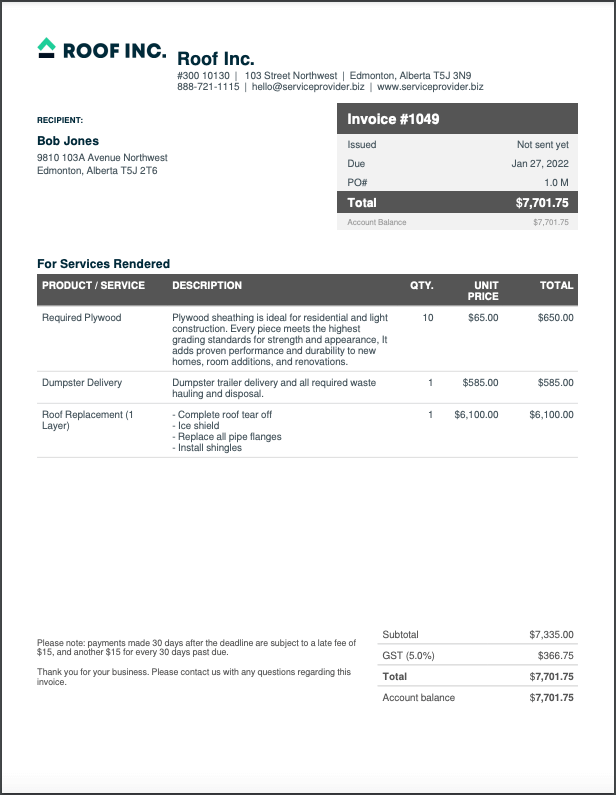
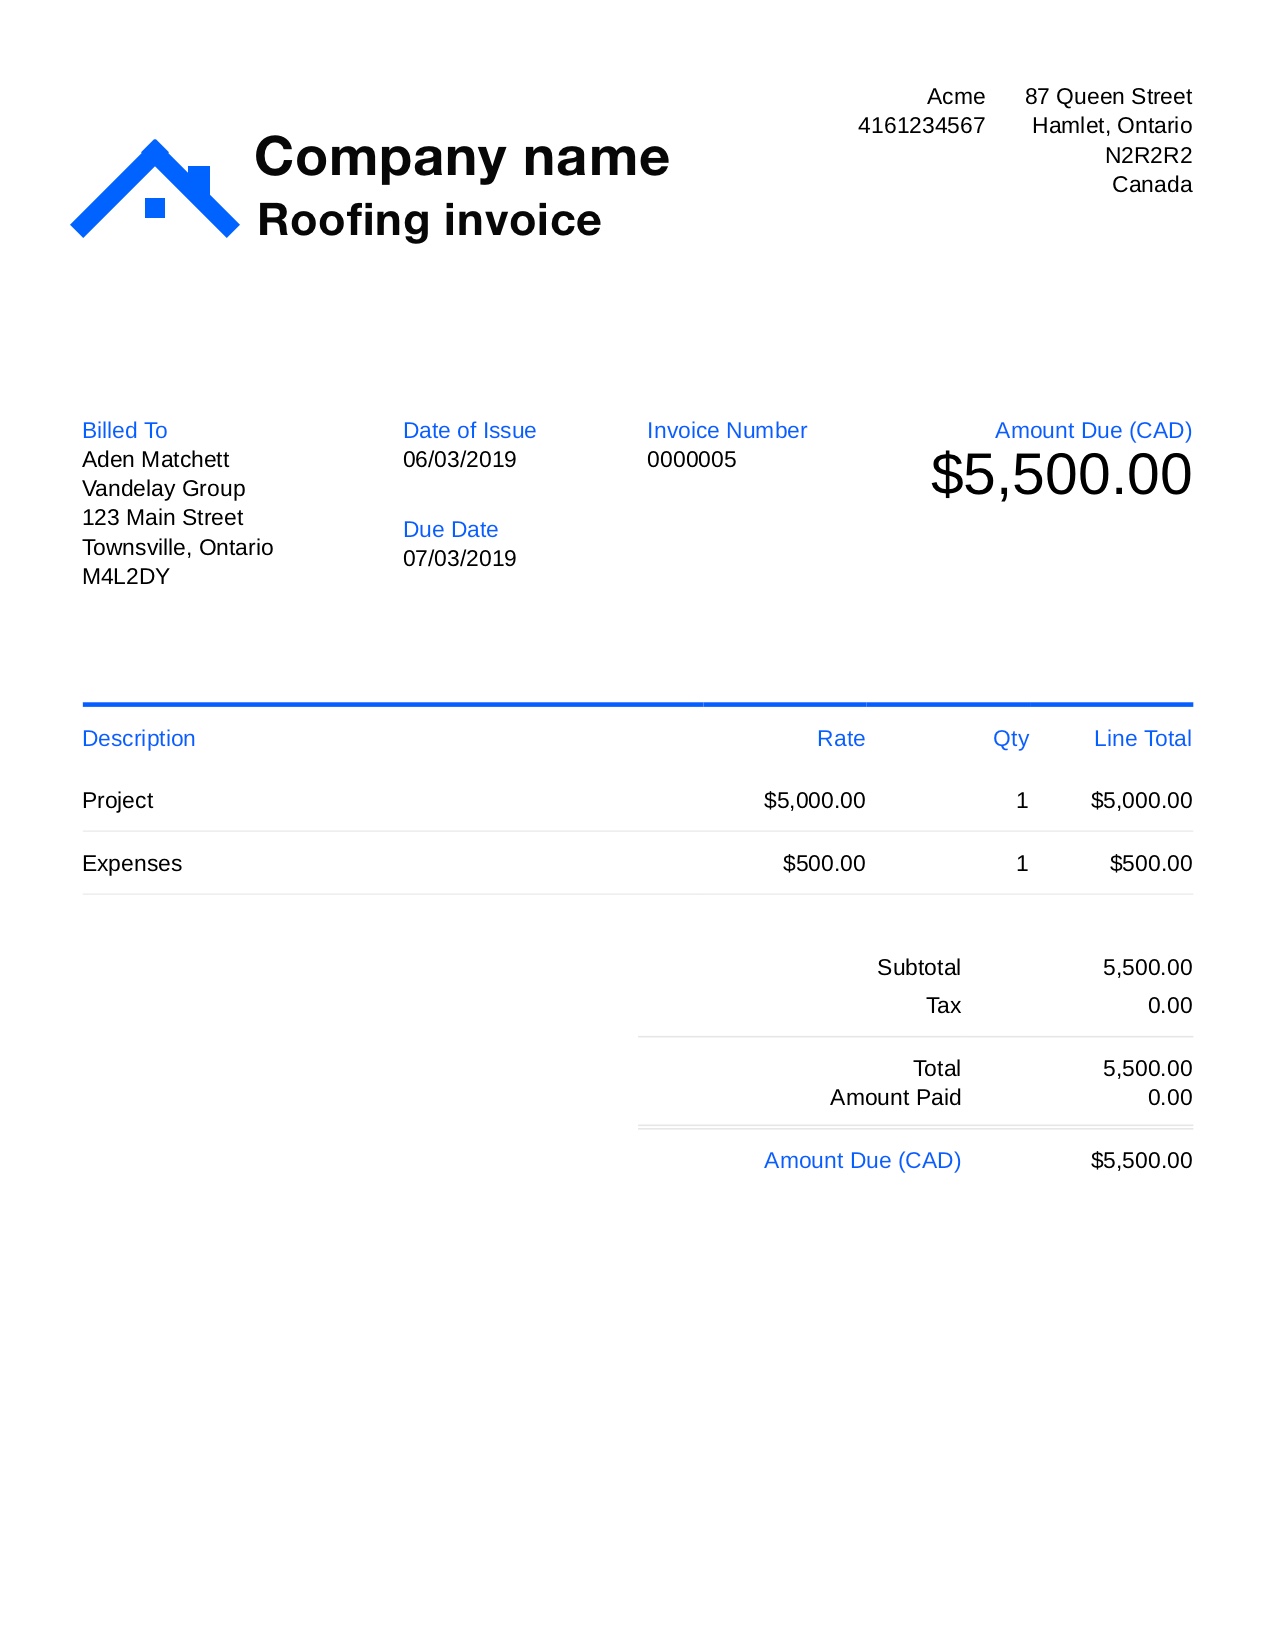
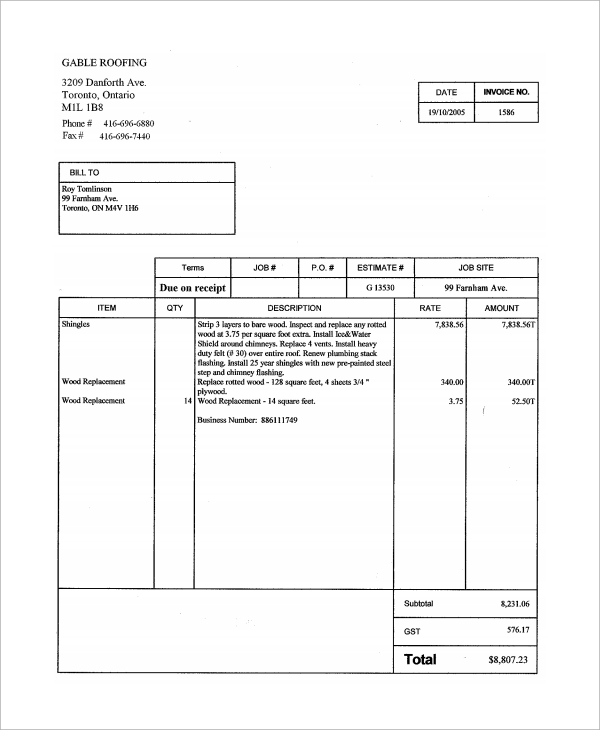
Here is an example of a roofing invoice template that you can use as a guide:
- Roofing Company Name: [Your Company Name]
- Address: [Your Company Address]
- Phone: [Your Company Phone Number]
- Email: [Your Company Email]
- Client Name: [Client Name]
- Address: [Client Address]
- Phone: [Client Phone Number]
- Email: [Client Email]
- Date: [Invoice Date]
- Invoice Number: [Invoice Number]
Description: [Detailed description of the work performed]
- Labor: $[Labor Cost]
- Materials: $[Material Cost]
- Additional Charges: $[Additional Charges]
- Discounts: $[Discounts]
Total Amount Due: $[Total Amount Due]
Payment Terms: Payment is due within 30 days of invoice date. Accepted payment methods: cash, check, or online transfer.
Conclusion
A roofing invoice is a crucial document for every roofing business. It ensures transparency, serves as a legal record, and helps maintain accurate financial records. By following the steps outlined in this guide and using a professional invoice template, you can create effective roofing invoices that contribute to the success of your business. Remember to be clear, specific, and prompt when sending invoices, and always maintain a professional appearance to build trust with your clients.
Roofing Invoice Template – Download